

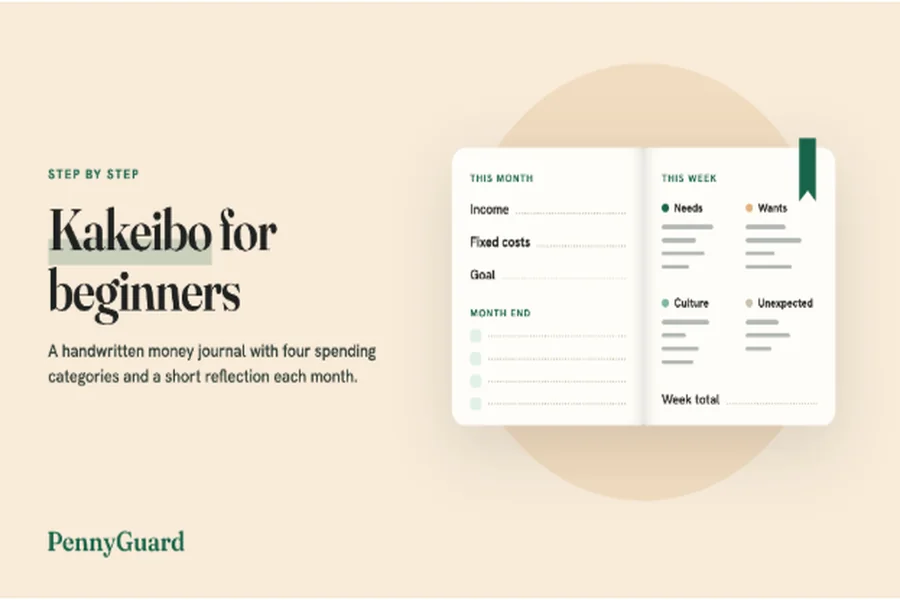
Kakeibo is a long-standing Japanese method of household budgeting built on writing things down by hand. The name translates roughly as “household account book,” and that is what you keep: one notebook for money coming in, money going out and your thoughts on both. Once it is set up, the notebook opens on a page with your income, fixed costs and a goal for the month, moves through weekly spreads with four spending columns, and closes on four questions you answer when the month ends.
Before you start
- A notebook you enjoy writing in, lined or grid, small enough to carry
- A pen, plus a second color if you like to mark categories
- Your expected income for the month
- Recent bank and card statements
- An envelope or pocket for receipts
Step 1: Set up a kakeibo notebook
Give the notebook its layout before you write a single figure. The first spread is the month start: income on the left page, fixed costs on the right and room underneath for a goal. Each spread after that holds one week of daily entries, divided into four columns for the categories in Step 4. Leave a blank page after the last weekly spread for the reflection in Step 6.
Writing by hand is central to the kakeibo method. Each entry takes a moment to put on paper, and that moment is often when you notice what you bought and why. Some people decorate the first page of each month with a small drawing or the month’s name in large letters; others keep everything plain, with a ruler and one pen. Whatever the style, use the same layout every month so the pages are easy to compare.
Tip: Rule the four columns on the first weekly spread, note how many squares or lines wide each one is, and copy that spacing for the rest of the month.
Step 2: Open the month with income and fixed costs
The month start records two things before any spending happens. On the left page, write what you expect to come in: wages, regular side income, benefits or support payments, and anything else you can count on. If your pay varies, write the lowest figure you are likely to receive and add to it as more arrives.
On the right page, list the fixed costs that leave your account whatever the month brings: rent or mortgage, utilities, phone and internet, insurance, a transit pass, loan payments, childcare, and the subscriptions and memberships you keep. Subtract the fixed costs from the income. What is left is the money you have to work with for the month, and the goal in Step 3 comes out of it.
The fixed-costs list is easy to leave incomplete, because these charges come out on different days and some renew only once a year. You keep writing everything by hand, and PennyGuard can help with this one page. It is a subscription cancellation app and budget tracker, and its approach, “it finds, you confirm,” leaves the writing to you. From the bank or card you connect, and your email if you add it, PennyGuard puts subscriptions, recurring bills and duplicate charges side by side in one list. You confirm which subscriptions are yours, and if some bills come out of a second account, you can connect that bank, card or inbox to PennyGuard too.
PennyGuard shows upcoming charges before they renew, so at the start of each month you can copy that month’s charges onto the right page in your own hand. For a charge that comes once a year, open the subscription to see its next renewal date and what it charged before, then mark it as described in the tip below. When a renewal is coming up, a heads-up goes to your inbox and to the app, and an alert follows the same two routes if a price changes or a charge looks unfamiliar. Either one is a cue to check the figures in your month start. PennyGuard also shows what you spend each month, which gives you a second total to set beside your own in Step 6.
Tip: Put a small star next to any fixed cost that renews yearly or every few months, along with the month it is due.
Step 3: Set a goal for the month
Kakeibo asks you to decide how much to save before the spending starts. Write the goal as one sentence in the space under the month start, with the reason attached. A goal such as “Put aside enough for the winter heating bill” or “Have my sister’s wedding gift covered by the end of the month” gives the number a purpose, and that makes it easier to stick with than a figure on its own.
Base the amount on what was left after fixed costs in Step 2, and leave room for food, transportation and the wants you know will come up. You can add a habit goal as well, such as cooking at home on weeknights or packing lunch for work. Both give the weekly check-ins something concrete to measure against.
Step 4: Record spending under the four kakeibo categories
Every purchase goes into one of four categories. Needs keep you housed, fed, healthy and able to get to work: groceries, gas, medicine, a bus fare. Wants are the optional things you enjoy: eating out, clothes beyond the basics, hobby gear, a coffee on the way in. Culture covers spending that feeds the mind, such as books, a museum ticket, a class or a concert. Unexpected holds the costs no one plans for: a car repair, a vet visit, a gift for a celebration you heard about late.
A small reference table on the inside cover helps in the first few weeks:
| Category | Covers | Examples |
|---|---|---|
| Needs | Essentials | Groceries, gas, medicine |
| Wants | Optional pleasures | Takeout, clothes, games |
| Culture | Learning and the arts | Books, classes, concerts |
| Unexpected | Unplanned costs | Repairs, vet visits, late gifts |
Write each purchase on the day you make it: what you bought, the amount and the category. A few purchases could go in either of two columns. A magazine might count as culture or a want, and groceries for a party as needs or wants. Decide once, write the rule under the table, and file that kind of purchase the same way every week. Fixed costs from Step 2 are already counted and stay off these pages.
Tip: Keep the day’s receipts in the envelope and write them all in at one sitting each evening.
Step 5: Hold a weekly check-in
Pick a regular time each week and keep it short. Add up each column for the week, write the totals at the foot of the spread, and compare them with what you had left after fixed costs and the goal. If wants are running high, you find out while there is still time to adjust.
Then write one sentence about the week, such as “Lunches out added up faster than I expected” or “Culture was higher because of the pottery class.” These short notes make the end-of-month reflection much easier. Before closing the notebook, look through your bank and card activity for the week to make sure each purchase made it onto the page.
Step 6: Close the month with the reflection questions
On the last evening of the month, turn to the blank page you left in Step 1 and answer four questions in writing:
- How much money did I have?
- How much did I want to save?
- How much did I spend?
- How can I improve?
The first three come straight from your pages: the month start, your goal and the weekly totals added together. The fourth takes more thought. Look at the weekly notes and the column that ran highest, then answer with one action you can check next month, such as “plan a weekly grocery menu” or “set a limit for wants before each weekend.” A broad answer like “spend less” is hard to act on.
After that, turn the page and set up the next month start. Carry over what still applies, such as a fixed cost that changed or a category rule you added.
If the notebook stalls
Several days went by without entries
Fill in the missing days from your recent bank and card activity and the receipts in the envelope. Then tie the writing to something you already do every day, such as clearing the table after dinner.
The weekly totals don’t match your account
Most gaps come from a purchase that was left off the page or a fixed cost entered twice, once on the first page and again in a weekly column. Returns count too: write a refund as a minus figure in the column where the original purchase went.
Your income changes from month to month
Set the month’s goal against the cautious income figure on the left page, and raise it once the extra money is in. Writing each deposit on its own line, with its date, shows how the month built up and makes next month’s estimate easier.
The weekly check-in keeps getting skipped
Cut it down to the four column totals. Leave the written note for a quieter week and keep only the habit of opening the notebook at the set time.
Quick recap
- Set up a notebook with a month-start spread, weekly spreads and a reflection page.
- Write income on the left page and fixed costs on the right.
- Set one goal for the month as a sentence with a reason.
- Record each purchase under needs, wants, culture or unexpected.
- Add up the columns once a week and write one note.
- Answer the four reflection questions when the month ends.